How to encrypt your home folder and swap partition in Ubuntu

Hey, Ubuntu users! If you haven't encrypted your hard drive, you should! An unencrypted hard drive makes it easy for someone to compromise your system when it's left unattended. With a few minutes of physical access to even a locked computer, an attacker (or prankster) could gain access to your sensitive files.
If you're using your computer for work, you should be even more careful to protect the information on your computer. In this tutorial, we'll cover how to encrypt your hard drive.
Full disk encryption > encrypted home folder > no encryption
Full disk encryption is better than just an encrypted home folder, but an encrypted home folder is better than nothing.
The best way to protect your computer's files offline is to enable full disk encryption. This ensures that all (or MOST) of your operating system and files are encrypted. However, full disk encryption of Linux systems is best performed during the installation of the operating system. And if you're reading this, I'm guessing you probably already have Linux installed, and you didn't enable full-disk encryption when you set it up. That's okay! In this tutorial, we'll cover the next best thing: encrypting your home folder and swap partition.
Preparation
Before starting, you should back up your home folder. The tool I recommend you use will perform a backup automatically, but it's still a good idea to do your own backup just in case.
These instructions are written for Ubuntu users, but can be applied to other distributions as well.
Installing the tools
First, install ecryptfs-utils and cryptsetup.
sudo apt update && sudo apt install -y ecryptfs-utils cryptsetup
User configuration
The user whose home folder is to be encrypted needs to be logged out during this process, and the one performing the encryption needs to be a sudoer (administrative user). If you already have another sudoer account on your computer, you can skip to the next step.
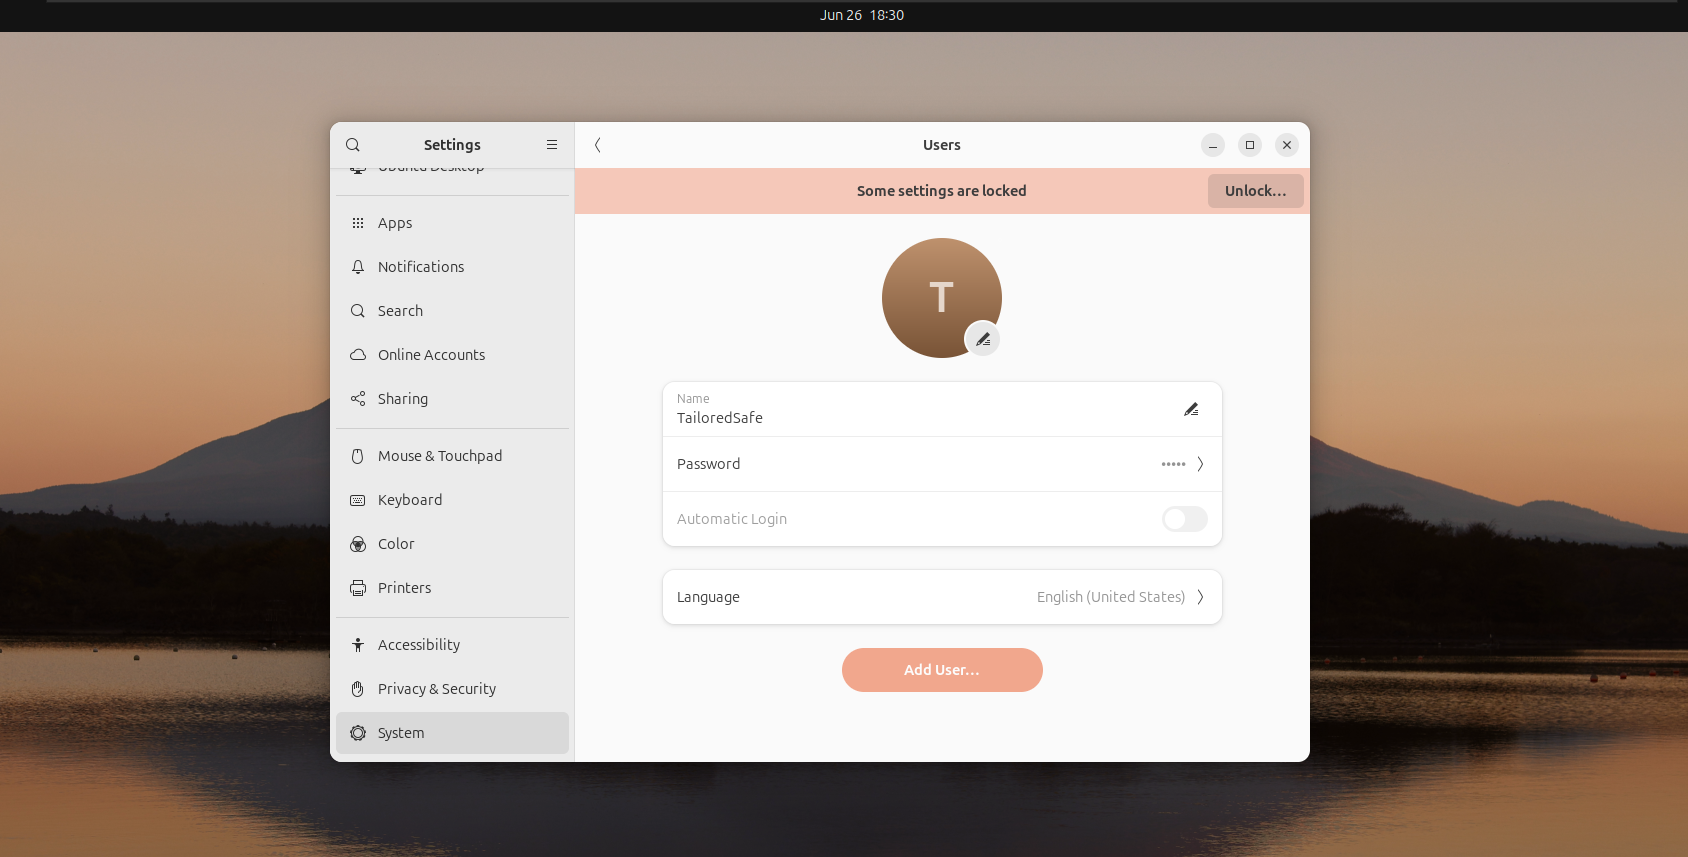
To set up a new sudo-enabled account on Ubuntu, open Settings > System > Users. Then click on Unlock... in the top right corner and type in your password.
Your system may look slightly different. I'm using Ubuntu 24.04 LTS, but the options should be relatively similar even if you're on a different version.
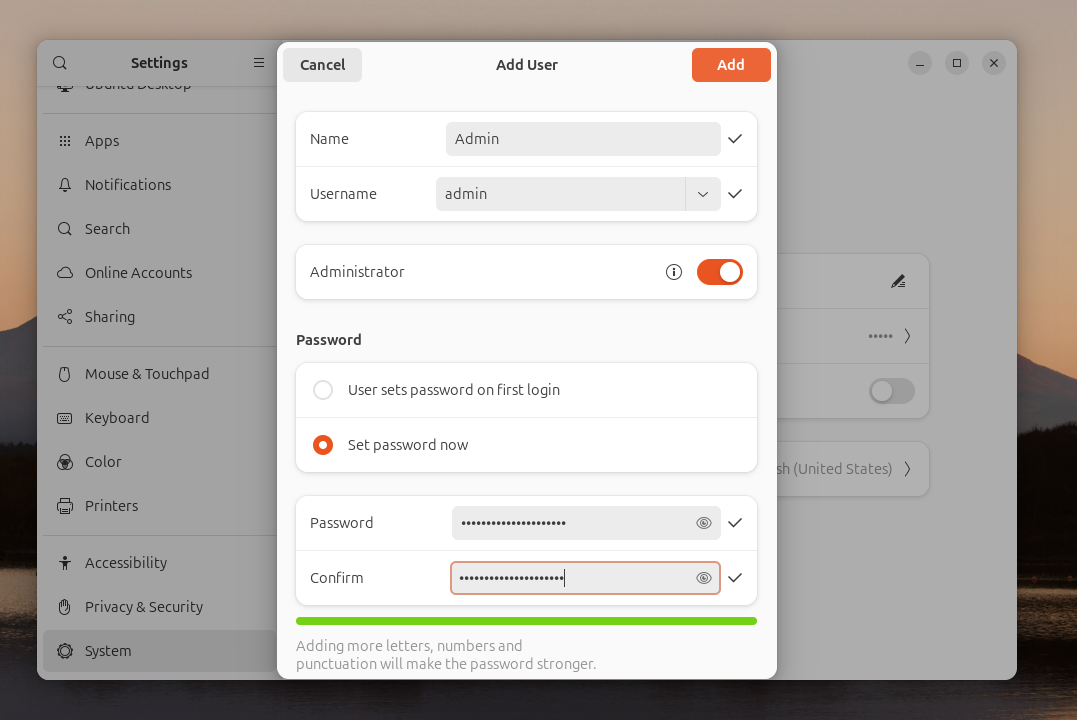
Next, click Add user and create the user. Make sure to make the user an administrator!
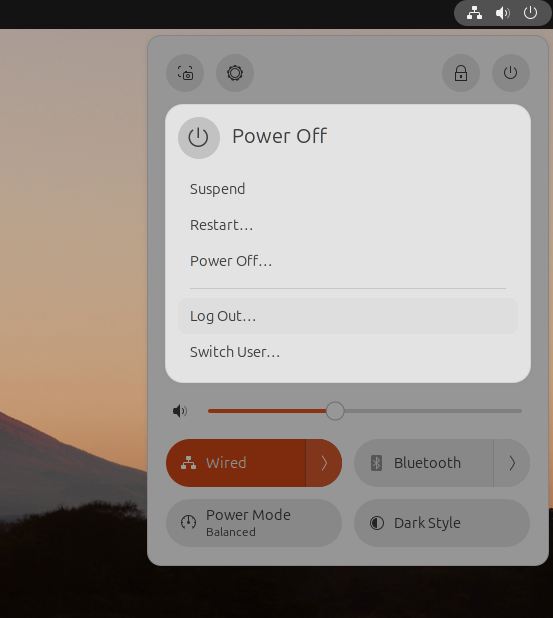
After creating the new user, log out of your user session.
Migrating to an encrypted home folder
At this step, you should:
- Be logged in as a sudo-enabled user
- Not be logged in as the user whose home directory is to be encrypted
- Have a backup of the home directory to be encrypted
If that's true for you, go ahead and open a terminal and run this command. (Replace <user> with the name of the user whose home directory you want to encrypt):
sudo ecryptfs-migrate-home -u <user>
You'll be prompted for a password. Type the password of the target user (not the user you're logged in as.)
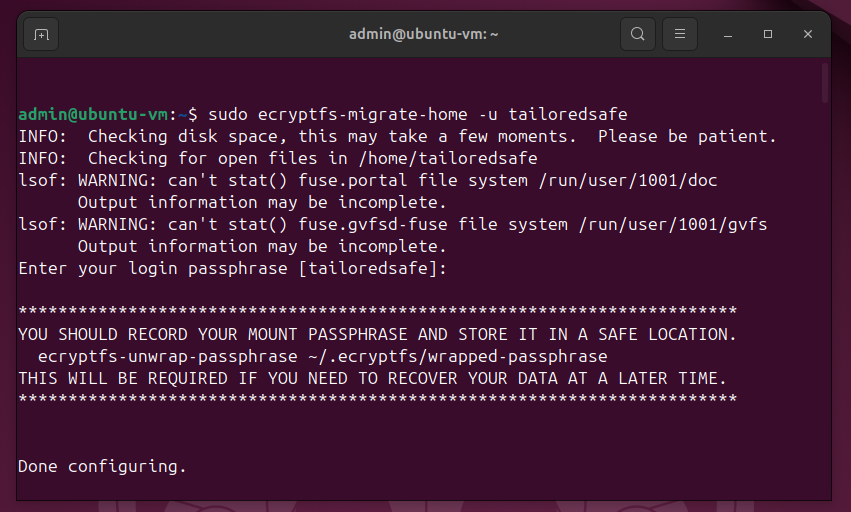
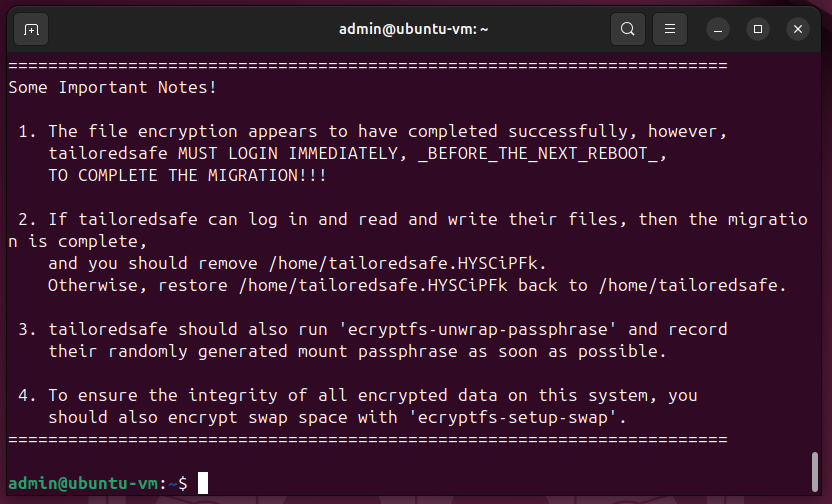
Once the command finishes, you'll see a few informational messages. Basically, they say:
- You need to immediately log into the user whose home folder was just encrypted, before the next reboot.
- The script automatically backed up the user's home folder so it can be restored if something went wrong.
- The script generated a mount passphrase for the home directory. Hopefully, you'll never need to use it, but you can use it to decrypt the home folder if it ever fails to decrypt at boot-up.
- You should also encrypt your swap partition. (More on this below.)
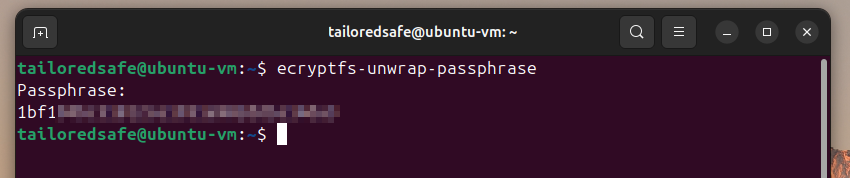
Log back in as the user whose home folder was just encrypted, open a terminal, and run this command:
ecryptfs-unwrap-passphrase
When it prompts you for passphrase: , type in your user's password. Then, you'll see a random string of characters. This is your mount passphrase, and you should save it somewhere safe like a password manager.
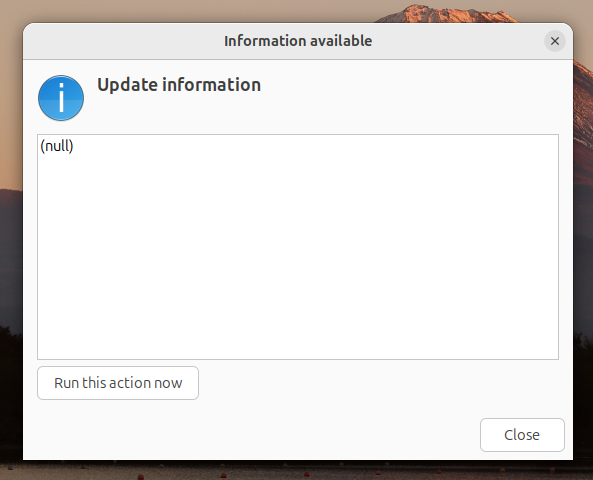
At some point, you'll probably see a window like this pop up on your screen. It's just a part of the script that's designed to prompt you to generate the passphrase you just retrieved, but in my experience, it takes a while to show up, and the message doesn't display properly. So you can just ignore it if you already ran the unwrap-passphrase command shown above.
Encrypting the swap partition
When you install Ubuntu with full disk encryption, your swap file is encrypted too. Lenovo has a pretty good explanation of swap files and it includes this quote:
"A swap file is a file on your computer's hard drive that is used as virtual memory. It is an extension of the computer's physical memory random-access memory (RAM) and acts as a temporary storage space for data that doesn't fit in the RAM."
That means data from your home folder could get loaded into the swap file temporarily, which might leave it vulnerable to attack. So, encrypting your swap partition is a solid way of making sure your encrypted data stays encrypted.
Before running this command, I recommend you alter the script slightly, and I'll show you why.
When you run the script to encrypt your swap partition as-is, you're likely to encounter a message stating:
“swapon: cannot open /dev/mapper/cryptswap1: No such file or directory”
This isn't necessarily a bad thing, and the script hasn't necessarily failed. There is a call within the script that runs systemctl restart cryptsetup.target after modifying /etc/crypttab. However, it does so without first calling systemctl daemon-reload. According to freedesktop.org:
“systemd-cryptsetup-generator is a generator that translates /etc/crypttab into native systemd units early at boot and when configuration of the system manager is reloaded.”
Therefore, the changes won't take full effect until either a reboot or manual re-run of the generators. So, you have two options:
Option 1 (recommended): Modify the script:
First, locate the script with this command:
which ecryptfs-setup-swap
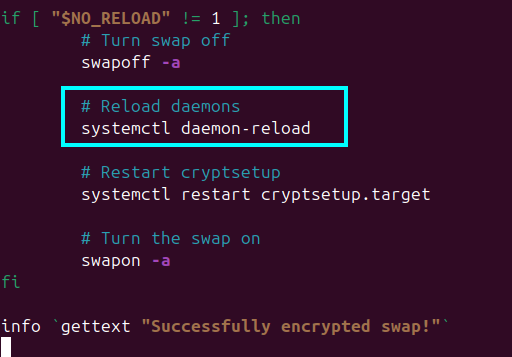
Then, open it in your editor of choice. (for example: sudo nano /usr/bin/ecryptfs-setup-swap) and add systemctl daemon-reload above systemctl restart cryptsetup.target near the end of the script as shown in the screenshot below:
Once you've modified and saved the script, you're ready to run it! Use this command to run it:
sudo ecryptfs-setup-swap
If you followed these steps and modified the script as instructed, you should see: “INFO: Successfully encrypted swap!” To verify that it worked, see the section on verifying successful encryption.
Option 2: Restart after running the script
If you run the script without modifying it, you'll encounter a message stating:
“swapon: cannot open /dev/mapper/cryptswap1: No such file or directory”
After encountering that message, reboot your computer and your swap partition should be successfully encrypted. To verify that it worked, see the next section.
Verifying successful encryption
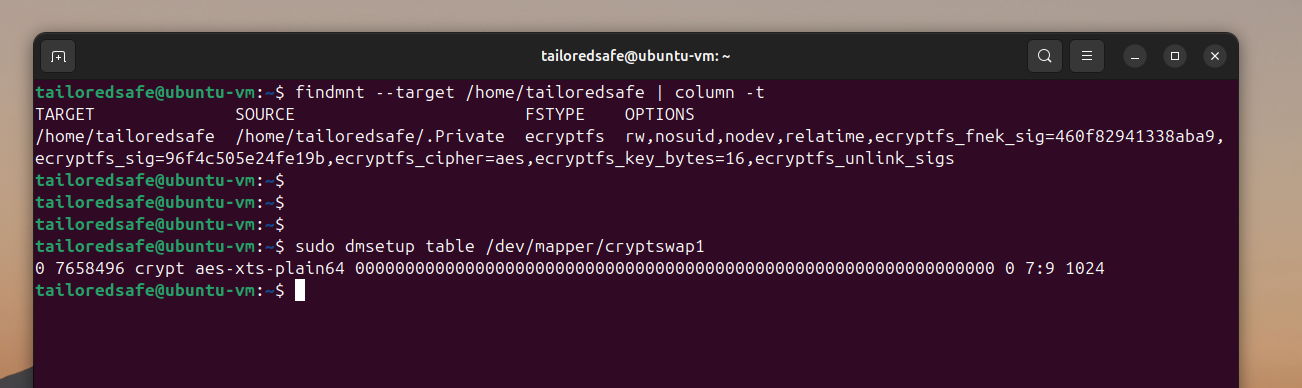
To verify that your home folder and swap partition were successfully encrypted, run these two commands. (Again, replace <username> with your username)
findmnt --target /home/<username> | column -t

sudo dmsetup table /dev/mapper/cryptswap1
The first command allows you to verify whether your home folder has been encrypted. The second command allows you to verify whether your swap partition has been encrypted. In both cases, you want to see ‘crypt’ in the command output to verify successful encryption.
Clean-up
If you've gotten through all those steps and were able to verify successful encryption, you're in great shape! In case you haven't already, you'll just want to make sure you can still read/write to your new home directory just to make sure it works. If that looks right, you can go ahead and delete the backup folder you created, as well as the one the script automatically created for you.
rm -rf /home/tailoredsafe.HYSCiPFk